Doing one thing and then another as I try to envision this project finished–and keep from getting bored and discouraged. Wires happened. I spoke to Tom Shiels about doing my wiring harness and he said “yeah no problem, just send me your existing harness,” which was what I was trying to get out of taking out of the Suby.
So I got the console out of the car and part of the dashboard. Somebody spilled like a ton of slurpees or something in there. It smells like urinal cakes and everything is sticky with what looks like cotton candy.
Got some wires exposed. Haven’t got any actually out yet.
Turned my attention to the oil filler neck for something fun to do. Thought maybe I could bend it with the heat gun, but ended up getting some burn–and no bend. So I then cut the original in such a way that by twisting the cut pieces 90 degrees, the filler is just right. But how to bond the pieces together?
Not sure my marine epoxy will get it. Looking about the shop I found a bit of PVC plumbing pipe that–who knew?–fits right snug in the filer neck. Figured I could maybe use a little piece of it to keep it all aligned.
But when I tried to fit the pieces together with the pipe inside–no good. The cut edges would no longer meet.
Stupidly, I got out the hack saw and cut a wedge out of one side.
So now they might fit together–but the filler is back near where it was in the first place!
Thought maybe if I bend the PVC pice just a little–then the filler will go where it needs to.
Out came the heat gun again. PVC bends this way pretty easily. Ended up with this.
Which would work pretty awesome if the PVC pipe didn’t melt at 140 degrees. We’ll call this a “proof of concept” while I test epoxy on that wedge piece I cut out–and look for a bit of metal pipe that fits the same as the PVC.
Next up I took the seats out and stripped the tunnel in prep for, well, just about everything. I’ll be pushing clamps through the floor to hold the coolant pipes, and I’ll have to weld up the holes in the tunnel, and there’s the matter of shortening the shift rod and–HEY!
The shift rod fits through this enormous hole where the e-brake used to be! Nice!
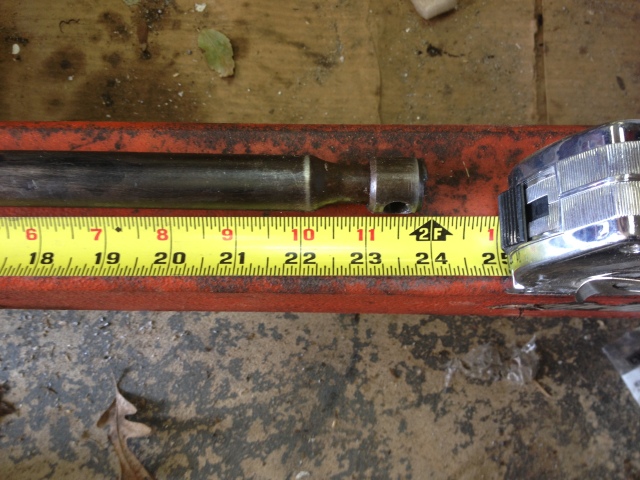
 The shift rod has already been shortened by almost two feet. It’s now just a hair short of 24 inches.
 It needs to be an inch and a quarter shorter still.
I cleaned the grease off it and replaced the shift rod bushing–this one has only been in a few years and it’s already giving way.
 I marked three lines along the length of the rod to keep it oriented properly, then drew verticals on either side of the old weld, just under an inch and a quarter apart. Used a metal blade on the table saw to cut it.
Inside the shifter was a copper or brass pipe, pretty thick, which was riveted on either side to the steel rod. I took that to be an alignment aid for the last weld job, and I had enough of it left over after my cuts to reuse it.
Lined up my lines, drilled the holes, put two pop rivets in it. Cleaned everything again.
Got out the arc welder and a skinny little rod, nodded the helmet down and…
So that won’t work.
I took it to Mike’s shop to see if he was still there, but it was just after five. So I’ll have to go back Monday or Tuesday and see if he can save me. (And hoping to get time to do that before yet another freaking blizzard buries us on Tuesday night).
Thinking now (and I should have been doing that before), that copper might have told me that the metal lumps on this rod that were there when I got it were not welds but braze. And I suspect Mike will suggest the same.
He’ll probably not even want to do this job now.
But I will get it done.


Pingback: Shift rod continued | bridgetmgtd